

User, groups and course access
Steps to configure Azure B2C Single Sign-On (SSO) Login into Simplylearn
1: Accessing and Navigating Azure Portal
Go to Home and in the Azure services, select Azure AD B2C.
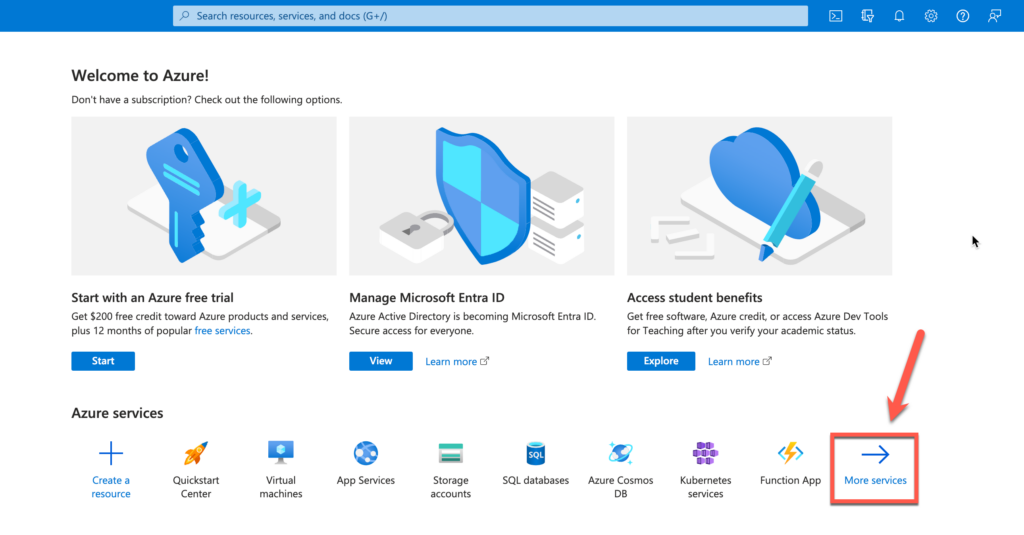
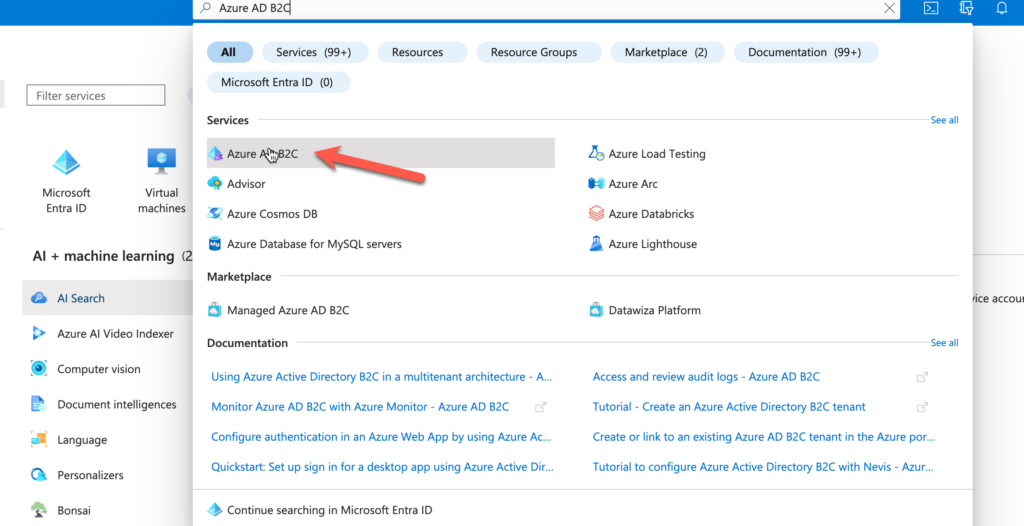
If you don’t see “Azure AD B2C” go to More Service and Search for it.
Please make sure you are in the Azure AD B2C directory with an active subscription and if not, you can switch to the correct directory.
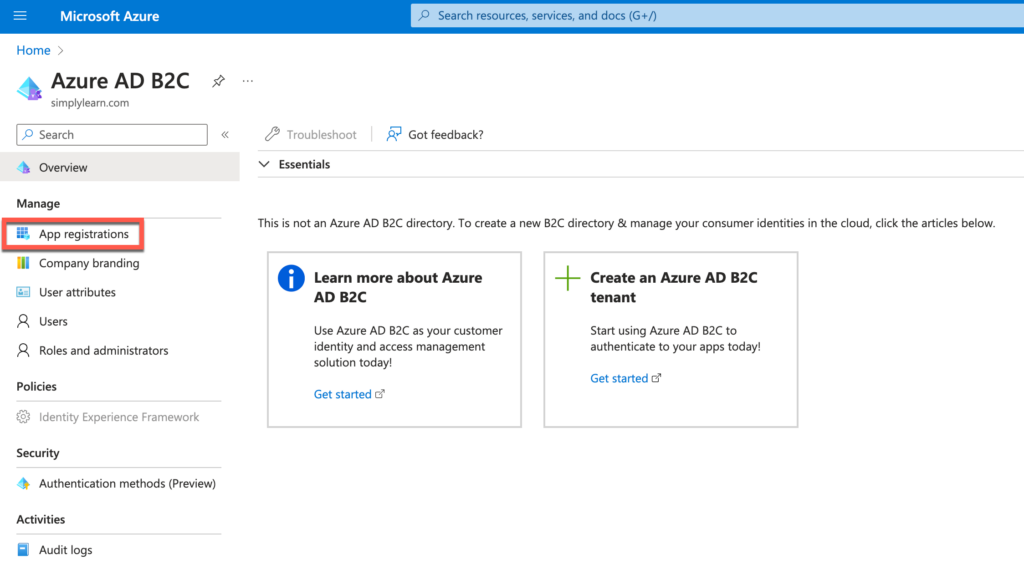
In the Essentials tab, you will find the Azure B2C domain name, keep it handy, you will need it later for configuring the Azure B2C tenant name under Simplylearn as an OAuth client.
Setting Up Azure B2C Application
Now, click on App registrations and then click on the New registration option to create a new Azure B2C application.
- Configure the following options to create a new application.
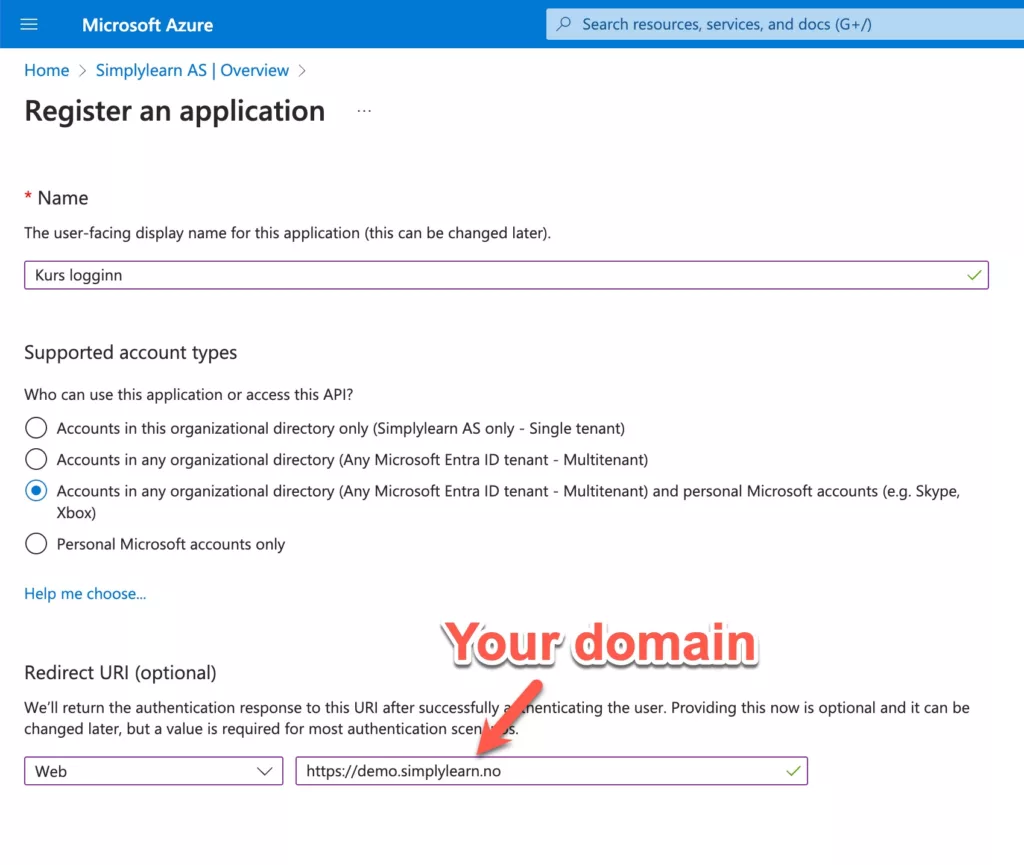
- Enter a name for your application under the Name text field.
- In supported account types, select 3rd option ‘Accounts in any organizational directory (Accounts in any organizational directory (Any Microsoft Entra ID tenant – Multitenant) and personal Microsoft accounts (e.g. Skype, Xbox))
- In the Redirect URI section, select the Web application and enter the Callback URL, which is the course platform domain like https://kurs.domain.no/ or https://domain.academy/ and save it under the Redirect URL textbox.
- Click on the Register button to create your application.
3: Application Details and Credentials
After successful application creation, you will be redirected to the newly created application’s overview page. If not, you can go to the app registrations and search the name of your application and you will find your application in the list.
Copy your Application ID and sent it in a email to Simplylearn Support.
The data can look like this (data under is not real):
Display name: Simplylearn
Application (client) ID: dglsk000-0000-0000-0000-HGSDU0000HG
Object ID: fhghd00hns-0000-0000-0000-HSGU0000
Directory (tenant) ID: ajhfhhdu8-0000-0000-0000-kd948undmksj
Supported account types: All Microsoft account users
Client credentials: Add a certificate or secret
Redirect URIs: 1 web, 0 spa, 0 public client
Application ID URI: Add an Application ID URI
Managed application in local directory: Simplylearn
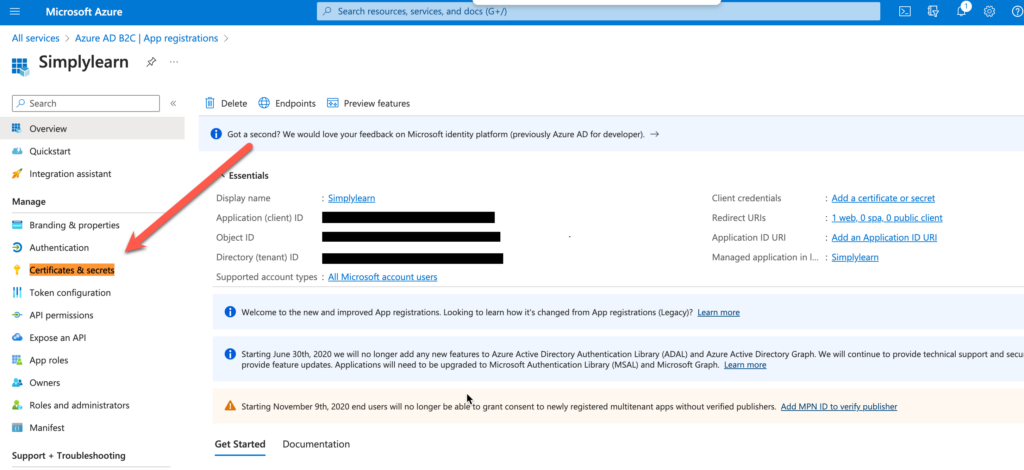
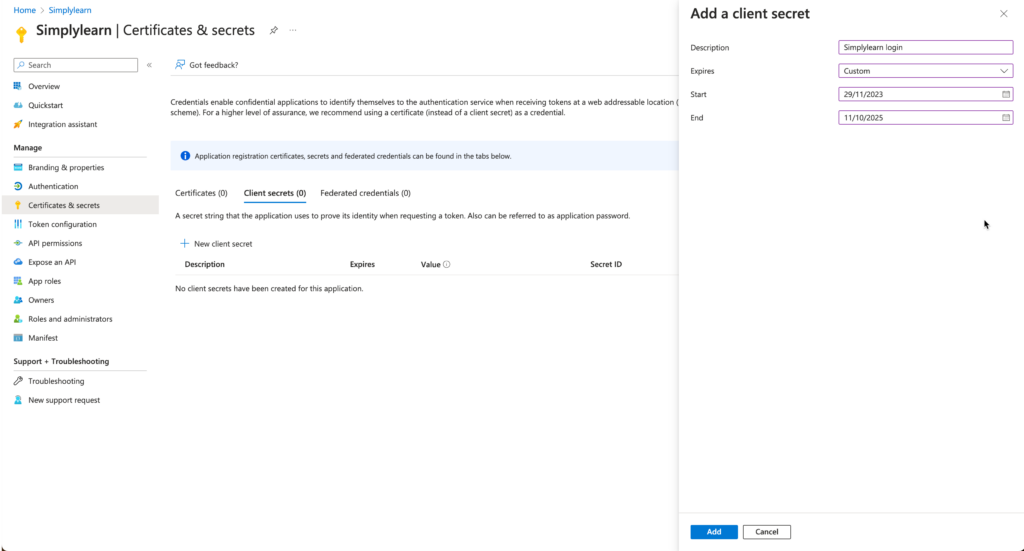
Now, click on Certificates and secrets and then click on New client secret to generate a client secret. Enter a description and click on the Add button.

Beware of this will expire so set the longest end date and start date as yesterday.
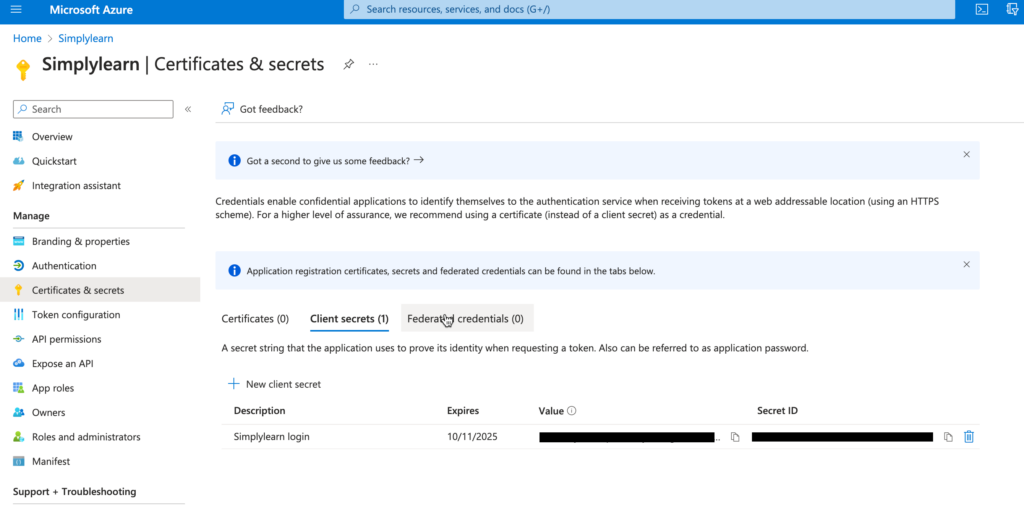
Copy the secret value from certificates & secrets page and send it to Simplylearn Support.
4: Add Users in your b2c application
- In home page, go to the Users tab in the left corner
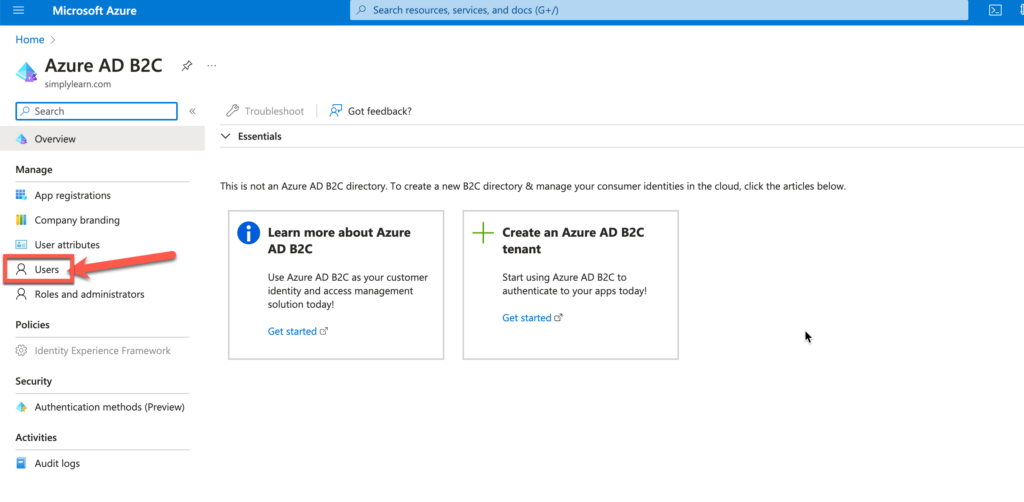
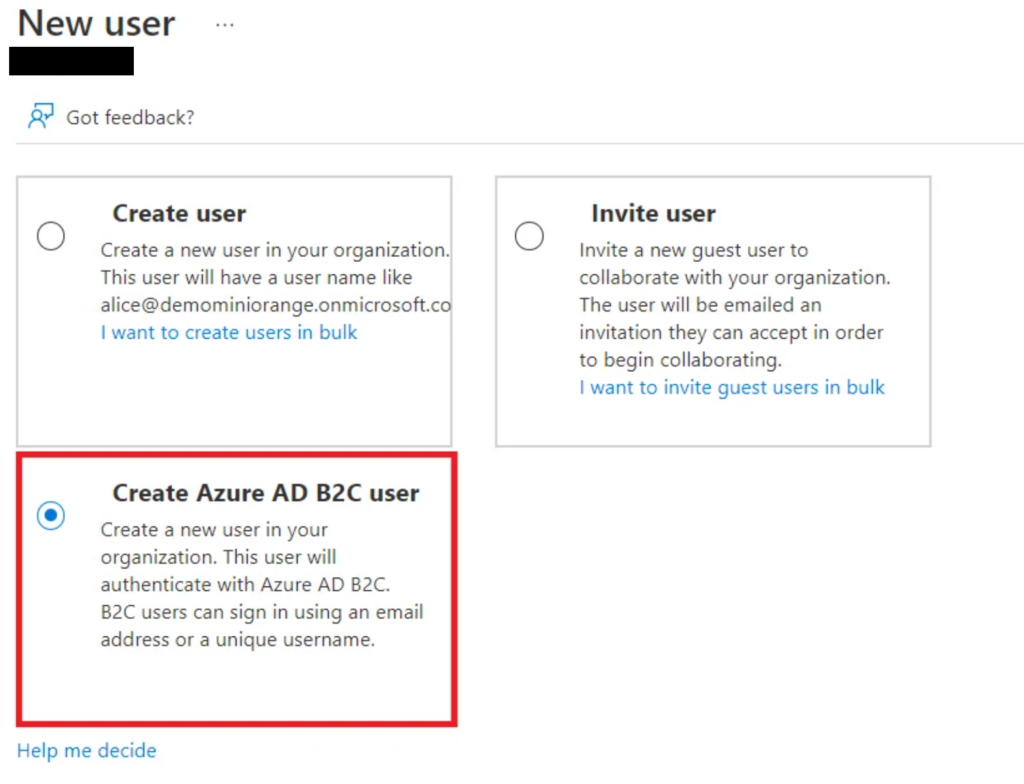
Click on New user in the users page.
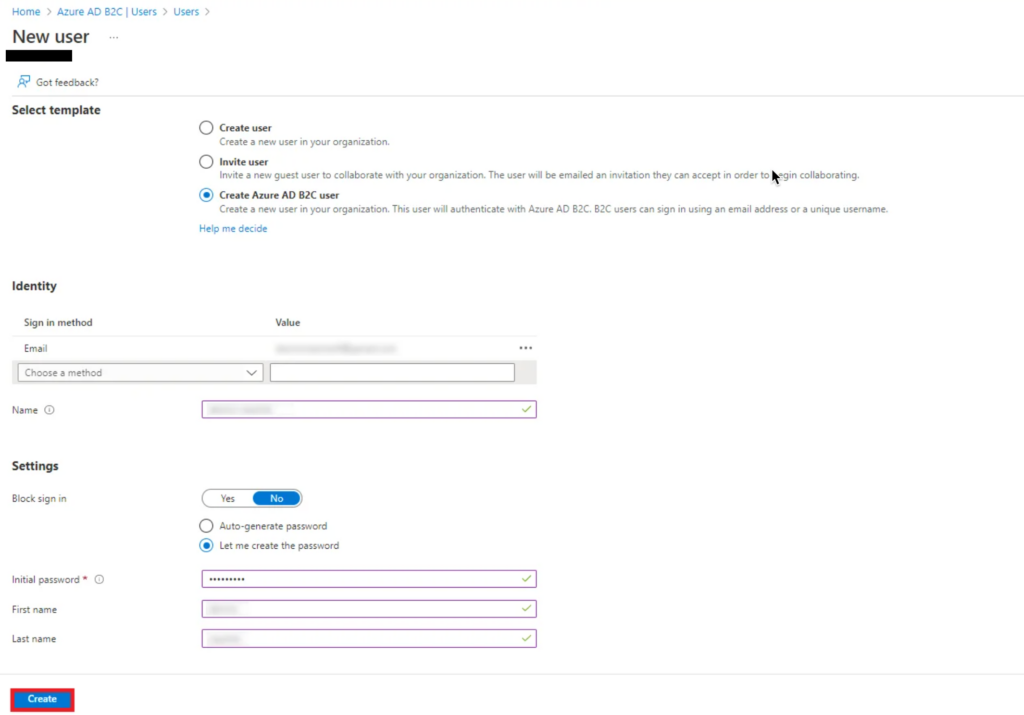
Select Create Azure AD B2C user. Then, scroll down and click on Email from sign in method and set your password and click create to save the user details to perform test configuration.
5: Creating & adding Azure B2C Policy
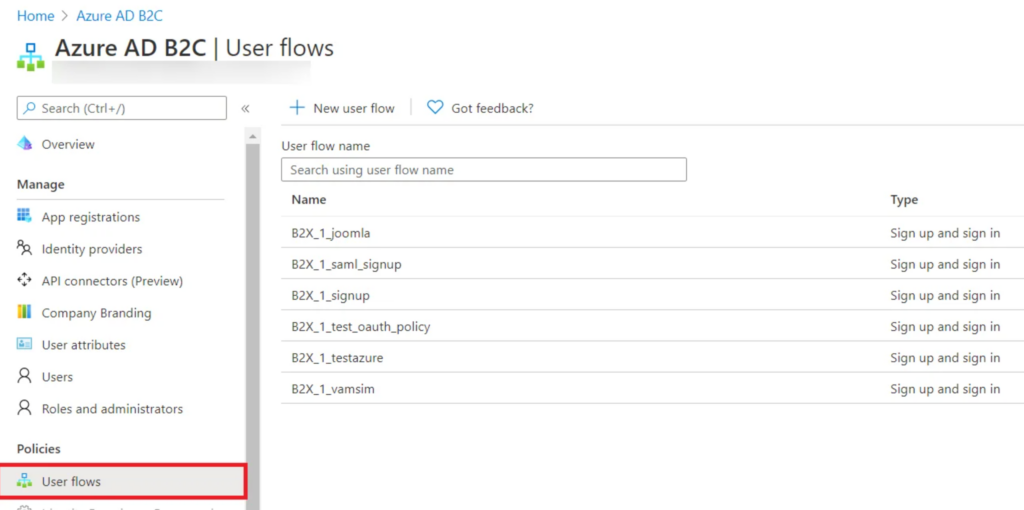
- Go to User Flows tab and then click on New user flow.
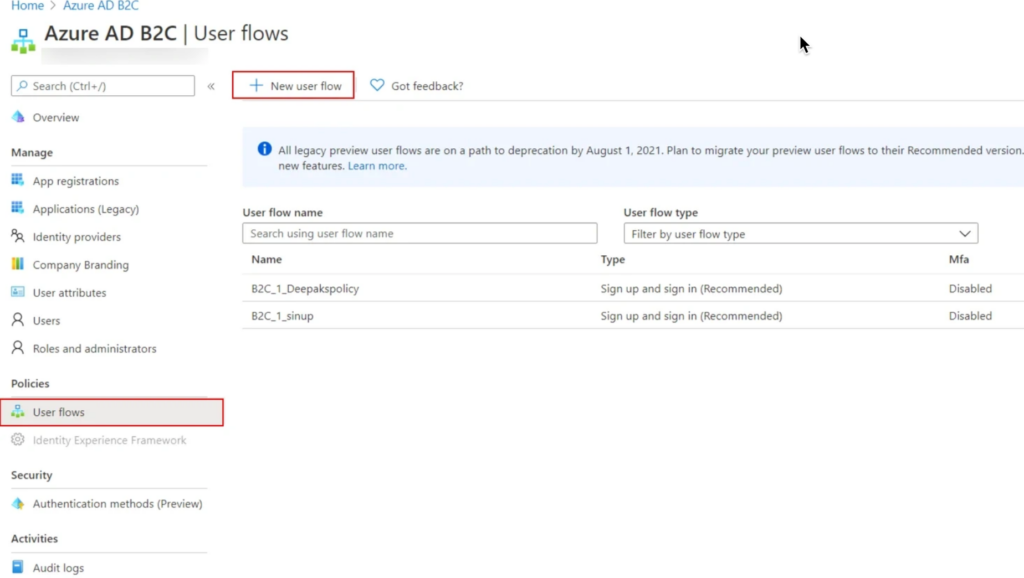
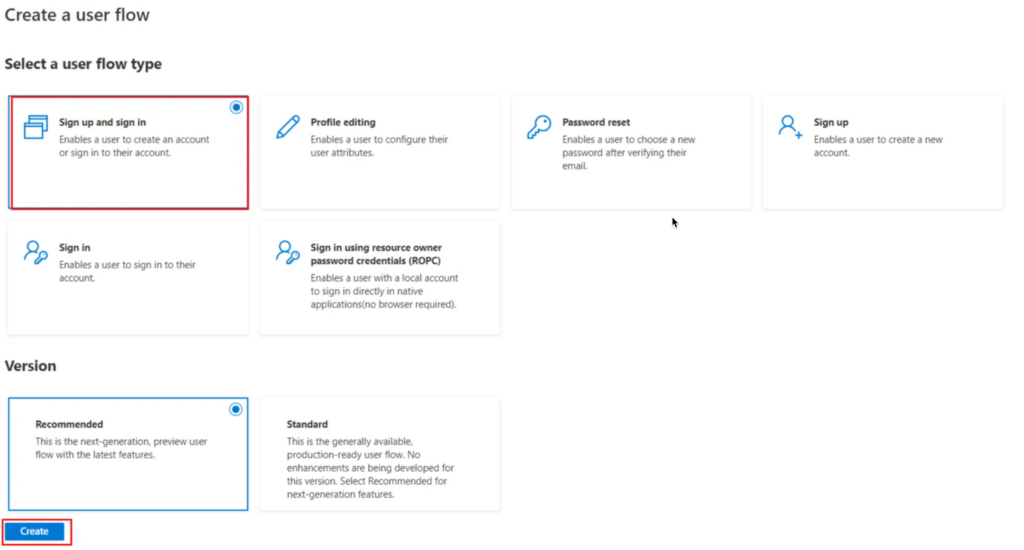
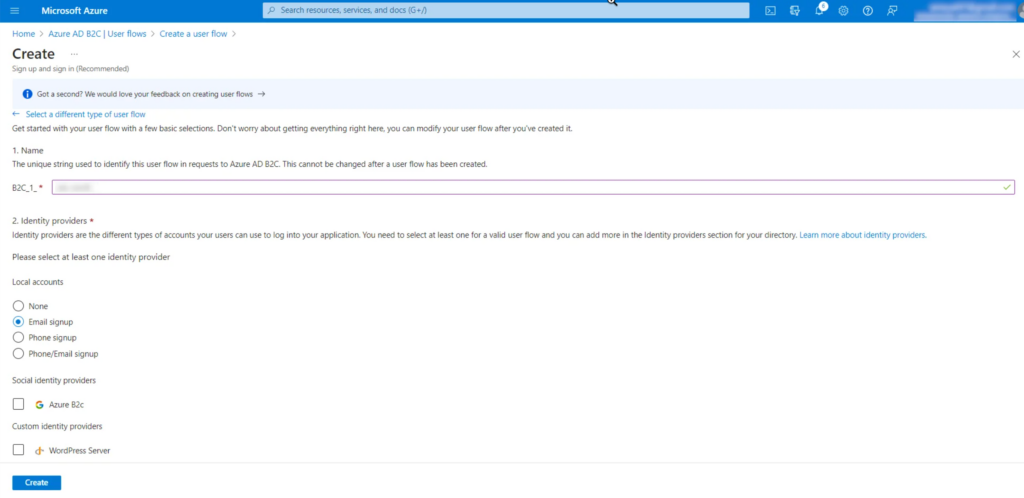
Select a User flow type Sign up and Sign in then click on Create button.
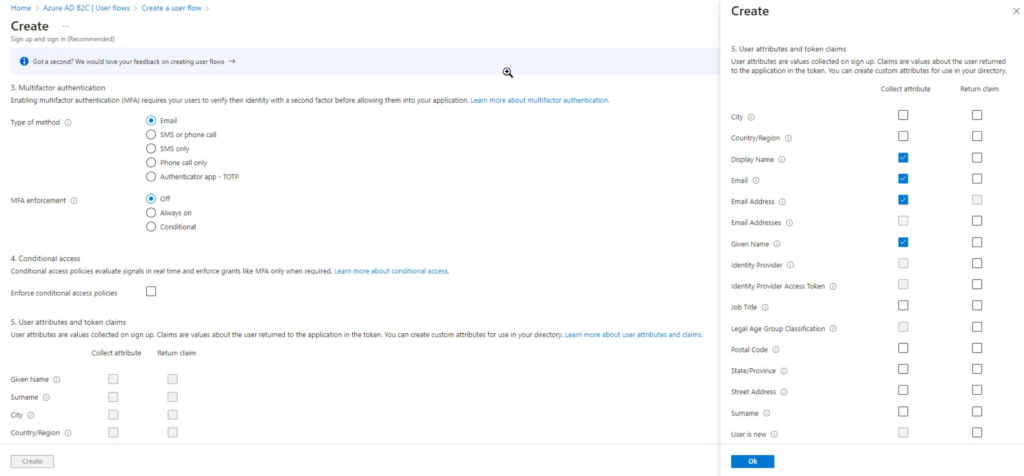
Fill all the information e.g. Name, Identity providers, etc. Select the User attributes you want to fetch while Signup. Then click on Create button.
Copy the Policy name this value you need to send to Simplylearn support.
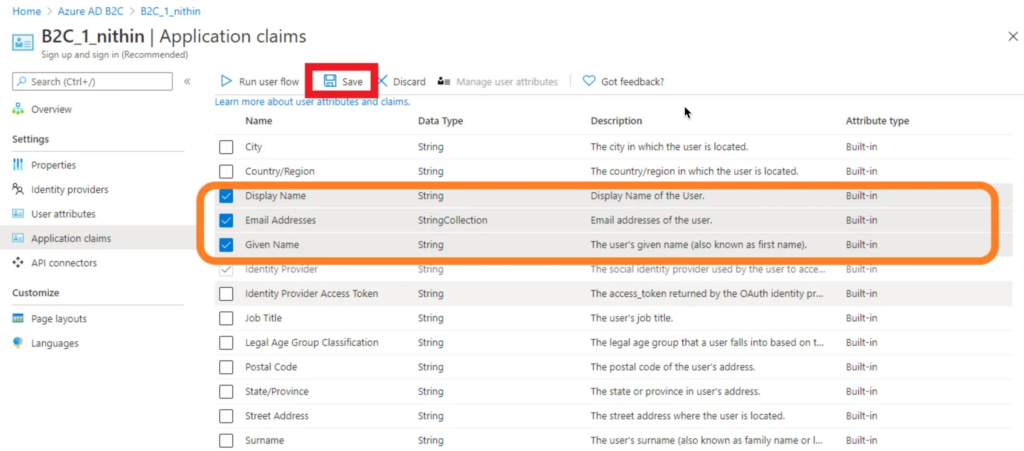
6: Add user claims to your application
- Go to user flows under policies in the left corner. Select the configured policy.
Select Application claims in settings
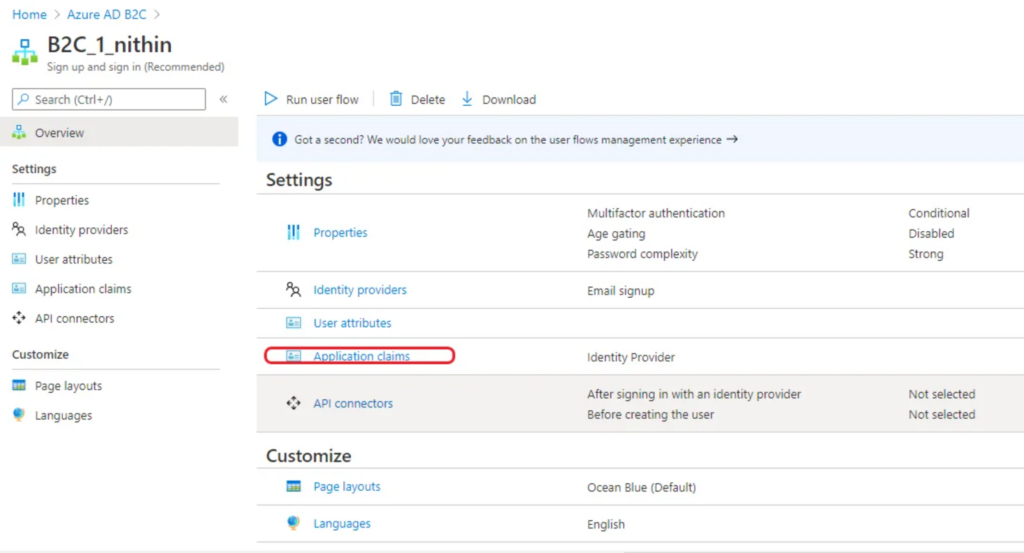
Select the desired attributes to be displayed on the test configuration and save it.
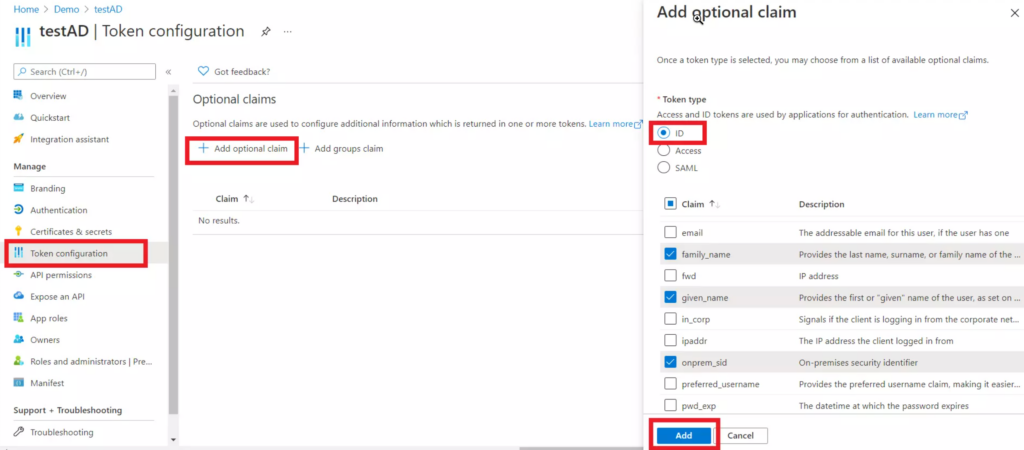
Step 1.4: Configure ID-Token Claims in Azure B2C [Premium]
- Go to your application in Azure Active Directory and select Token configuration from the left menu.
- Click on Add optional claim and then select ID from the right section.
- Now choose all the attributes you want to fetch while SSO (e.g family_name, given_name, etc) and click on Add button.
- You might see a popup to Turn on the Microsoft Graph profile permission (required for claims to appear in token), enable it, and click on Add button.
You have successfully configured Azure AD B2C as OAuth Provider for achieving user authentication with Azure AD B2C Single Sign-On (SSO) login into your Simplylearn Site.
Go back to the Tenant Name & Policy Name found from the Azure B2C SSO application.
Please refer the below table for configuring the scope & endpoints for Azure B2C in the plugin.
| Scope | OpenID |
| Authorize Endpoint: | https://<domain-name >.b2clogin.com/<domain-name>.onmicrosoft.com/<policy-name>/oauth2/v2.0/authorize |
| Access Token Endpoint: | https://<domain-name>.b2clogin.com/<domain-name>.onmicrosoft.com/<policy-name>/oauth2/v2.0/token |
| Get User Info Endpoint: | https://graph.microsoft.com/v1.0/me |
| Custom redirect URL after logout: | https://<domain-name>.b2clogin.com/<domain-name>.onmicrosoft.com/<policy-name>/oauth2/v2.0/logout?post_logout_redirect_uri=<your url> |
After you’ve set up the endpoints, please send them to SimplyLearn support.
Then you are done (-:
Remember to send all credentials and endpoints to the SimplyLearn support.
For reference, here is a list with all the details we need:
- Display name
- Application (client) ID
- Object ID
- Directory (tenant) ID
- Domain-name
- Policy-name