

User, groups and course access
How to create groups
Simplylearn Groups give you the ability to group certain users together and assign a Group Leader who can track the progress and performance of any user in their group. Groups can have any number of courses associated with them, and anyone in that group will be automatically enrolled in the course(s). Below we have listed some examples on when user groups can be optimal:
- You are a teacher and you want to divide up students into classes so that you can track them independently from one another.
- Small group tutors. You may be running a course with a hundred students, but you want to break it into smaller groups that can be led by a group leader.
- Your organization has multiple locations and you want to track progress & performance by location
- You want to drip-feed lessons to users on the same schedule
This article will inform you how to create a group and adding courses to the group. Then how to assign a group leader, and lastly how to include users into your group.
Creating a Group
- Navigate to Simplylearn > GROUPS
- Click Add New
- Give the group a title
- (Optional) Give the group a description
- NOTE: Group description and Course Materials will be publicly visible by default. If you wish to set those to “group enrollees only” you must include the content within student shortcodes.
Adding Courses to a Group
Once you have created a group, you can now assign courses to it. When a course is assigned to a group, any user who is in the group will automatically get enrolled in that course. There are no limits on the number of courses that can be associated with a group. Courses can also be associated with multiple groups.
- Still on the Edit Group page…
- Select the Courses tab
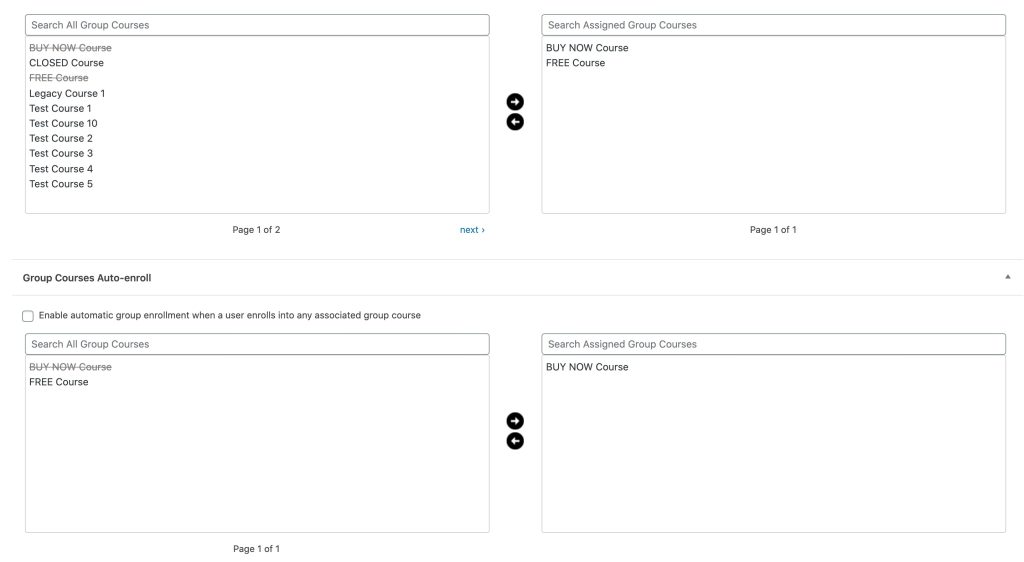
- Add any desired courses from the right-side. Group Courses section onto the left-side box.
- To do this, choose the course(s) you want to add to the group by clicking on the course title. Hold CTRL (CMD on Mac) to select multiple courses at once.
- Click the right arrow to move the course(s) into the Assigned Group Courses window
- If you want users to be automatically added to a group upon ANY assigned course enrollment, select the Enable automatic group enrollment when a user enrolls into any associated group course checkbox. Alternatively, you can specify which course enrollment should grant automatic group enrollment by leaving the option unchecked and adding courses into the right-side box.
Assigning a Group Leader
After you have added courses to the group, you must select a Group Leader. There are no limits on the number of Group Leaders that can be assigned to a group, but it must have at least one.
Assigning a Group Leader to a group is the same process as when you assigned courses.
- Still on the Edit Group page…
- Scroll down to Group Leaders
- Choose on the user(s) you want to add as Group Leaders by clicking on their name. Hold CTRL (CMD on Mac) to select multiple courses at once.
- Click the right arrow to move the user into the Assigned Group Leaders window
Adding Users to the Group
Adding users to your group is similar to how you added courses and Group Leaders.
- Still on the Edit Group page…
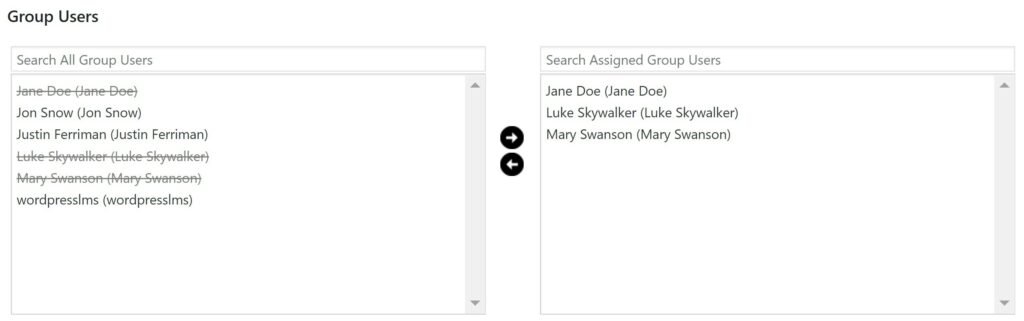
- Scroll down to Group Users
- Choose the user(s) you want to add to the group by clicking on their name. Hold CTRL (CMD on Mac) to select multiple courses at once.
- Click the right arrow to move the user into the Assigned Group Users window
Further progress
You have now created your user group. With this group you can:
- Create a group sign-up URL, which automatically enrolls the users into a group upon signing upon from the specified URL.
Related articles